An API (application program interface) is a set of routines, protocols, and tools that specify how software components should interact. The purpose of the FileMaker Data API is to allow web services to access data in hosted databases. The FileMaker Data API conforms to Representational State Transfer (REST) architecture, so you may hear it referred to as a REST API.
Your web service or application can make calls to the FileMaker Data API in order to get a token that authenticates the connection and grants access to the hosted database. This token needs to be included in the header of all subsequent calls to the hosted. The token will be valid until you log out of the database session, or for 15 minutes. This connection is referred to as a session.
The calls to the FileMaker Data API can be used to create, update, delete, and find records, view data of specific records, perform scripts and more. The FileMaker Data API returns data in JSON, which is a notation designed to be easily read by humans.
Preparing your database for data API access
In order to prepare your database for Data API access, it needs to be hosted. The server name is essential in writing calls to the FileMaker Data API, as you will see in a later section.
Along with all the standard techniques for protecting a hosted database, a requirement for using the FileMaker Data API is to have a password protected account. It is recommended to designate a specific account solely for the purpose of interacting with the FileMaker Data API. When creating that account, you can satisfy the last requirement of prepping your FileMaker which is enabling the fmrest extended privilege.
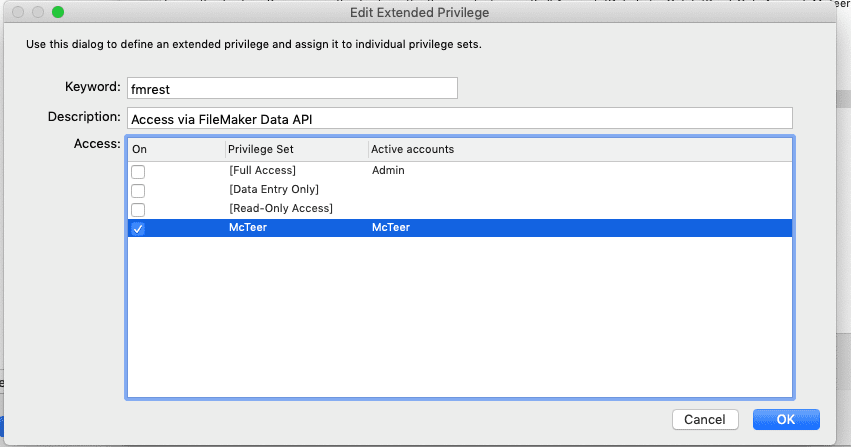
To assign this extended privilege to a privilege set, Click File > Manage > Security…, then click advanced settings in the bottom left corner, go the Extended Privileges tab, double click the desired keyword, then assign it to the privilege sets that you want to grant FileMaker Data API access to.
Something to keep in mind when prepping your databases for FileMaker Data API access is that, when retrieving data, the FileMaker Data API will grab every field on a specific LAYOUT. So, if you want the API to have access to more fields than the layouts do, you will need to make specific layouts, that include all of the desired fields, to direct the API calls to.
Write FileMaker data API calls
A FileMaker Data API calls consist of the following components:
- An HTTP Method (HTTP verb)
- HTTP Headers
- A call URL
- Parameter data in JSON format
These components should look familiar to developers experienced in using the Insert From URL script steps. You can dive deeper into the capabilities and uses of each of these components inside the FileMaker 18 Data API Guide. To demonstrate FileMaker Data API calls in this blog I will be using an API development application called Postman. One of the features of Postman is that it allows you to create and manage “collections” which are organized groups of “requests”, which will FileMaker Data API calls in this example.
FileMaker Data API Calls can be used to:
- Connect/Disconnect from a Database
- Get metadata (pertaining to host and hosted databases)
- Create/Edit/Delete records
- Duplicate records
- Get a single record
- Get a range of records
- Upload container data
- Perform a find request
- Set global field values
- Run FileMaker Scripts
Authenticate a database session
No matter what your end goal in using the FileMaker Data API is, your first call will remain the same: authenticate. As you will see in the guide, you use an HTTP POST method with the sessions API endpoint specifying the name of the desired hosted database. The password protected account credentials must be specified in the header Authorization string. If the account name and password are valid & have the necessary extended privilege enabled, the generated response will contain the previously mentioned token, and the session is opened. This token will be needed in all subsequent calls. Below is a screenshot of my Postman app, after completing an Authentication call. The URL is near the top, between the HTTP method dropdown and the blue Send button. It will take the format of: /fmi/data/version/databases/database-name/sessions. It is completely essential to make sure the HTTP method dropdown is set to POST for authentication.
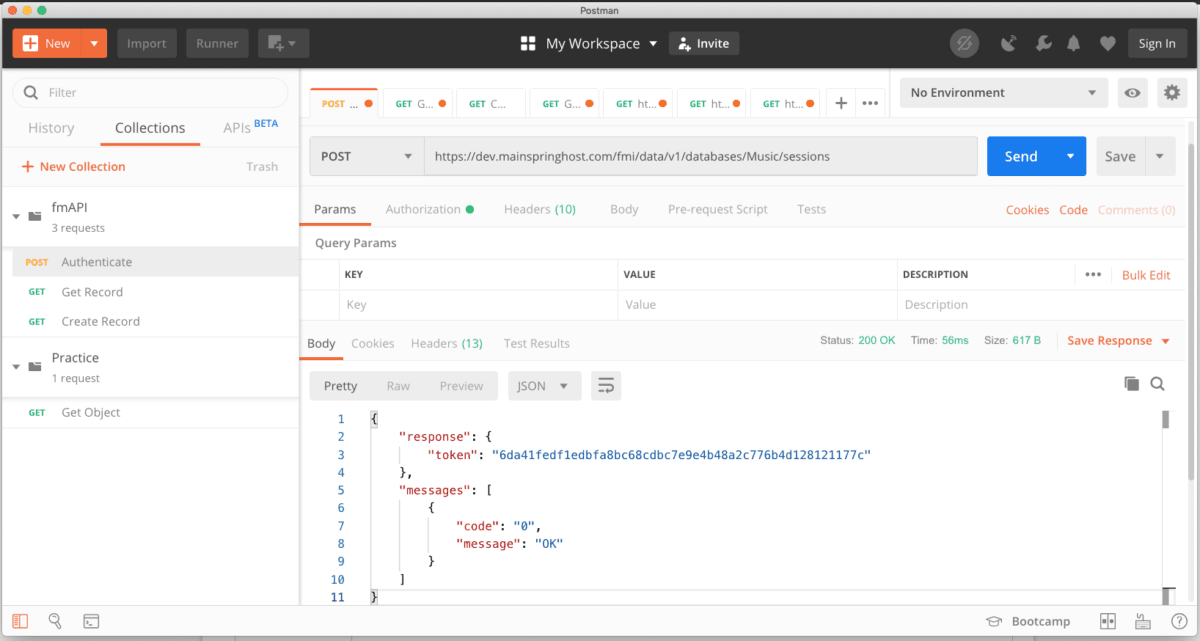
The guide will tell you the necessary data needed in each component of the call. For example, to login to a database session requires 2 pieces of data in the HTTP header. To edit the components Params, Authorization Headers, Headers, Body, Pre-request Script, or Tests with Postman, use the tab control, below the URL bar.

Once all the components are set, clicking the blue Send button will generate a response, which in the case of authentication, contains the token needed for all other calls.
Getting records
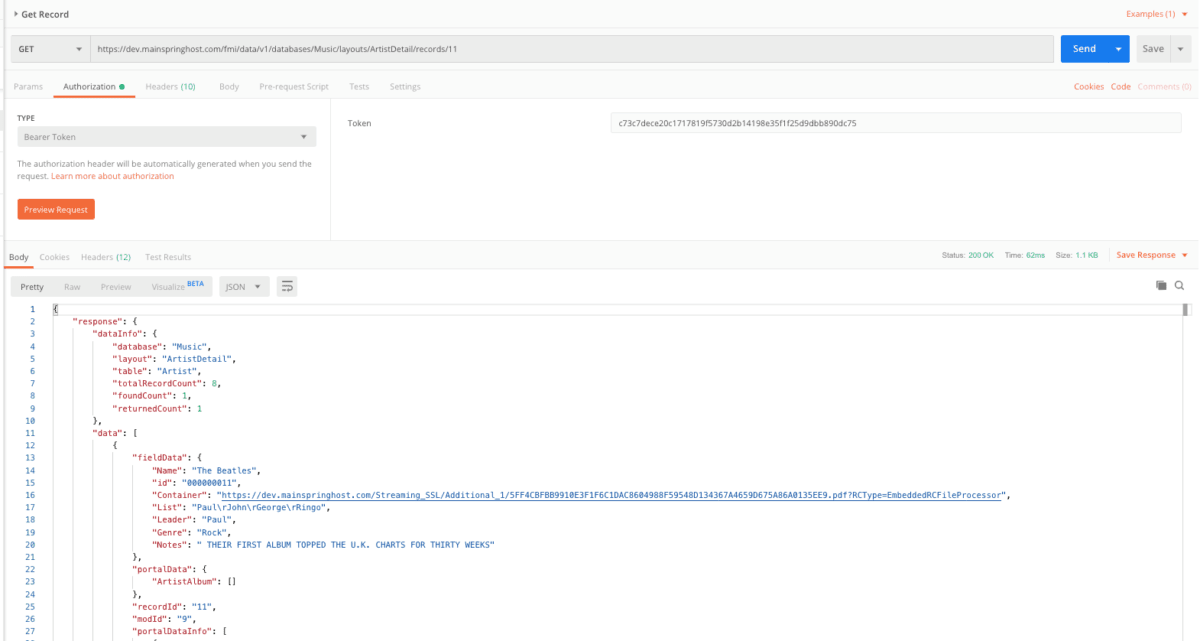
Once you have the authentication, your session is open and you can use that token to make calls that allow you to get or send information to your database, through the FileMaker Data API. Let’s break down a simple GET record API call. The URL structure for getting a record is: /fmi/data/version/databases/database-name/layouts/layout-name/records/record-id
When setting up a call like this, remember that when getting record data using the FileMaker Data API, the API can only retrieve data from fields that are on the layout you point it to. Also, keep in mind that there is an additional format for GET, for when you need to retrieve portal data.
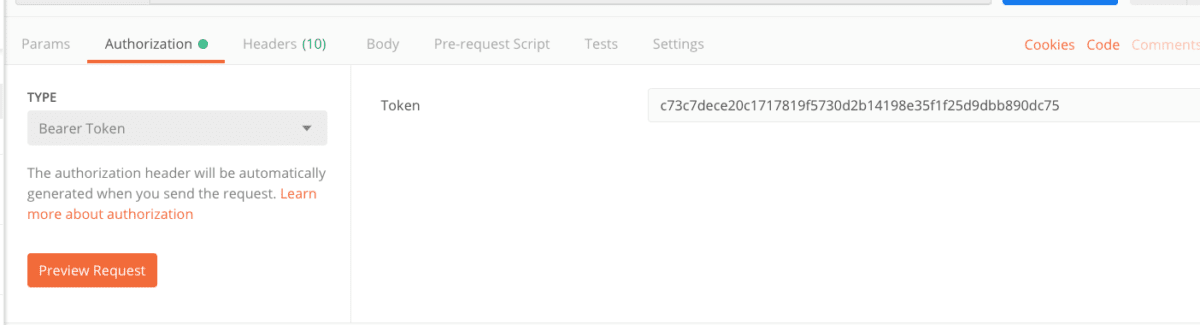
As you can see in the guide’s info to get a single record, the HTTP heard requires Authorization, of the type: Bearer session-token. So, go to the authorization portion of the tab control, and select Bearer Token as the TYPE. Once you do that, you are provided a textbox for the token, shown below, where you can enter the token you were given in the response of your authentication call.
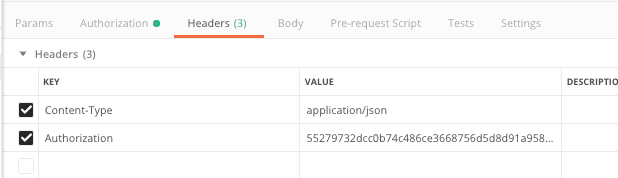
Along with the authorization, an additional header is required, and that is setting the Content-Type. To do that, click the headers section of the tab control, begin typing in the empty KEY field and select the keyword, Content-Type. Go to the corresponding VALUE field and enter the keyword application/json.
Once you have both the Authorization & the Content-Type set, click send, and you will receive all of the data on the specified layout for the record you specified in the URL. My example GET single record call is posted below.
Creating records
The last example call I will cover in this blog is creating records. To create a record use an HTTP POST call with the structure provided by the guide: /fmi/data/version/databases/database-name/layouts/layout-name/records
As always, make sure you have a designated layout in mind, or create one if necessary. The layout specified in the end point must contain every field you want to put data in. As far as headers, you need the typical Authorization data, as well as the same Content-Type header as the previous Get Records example.
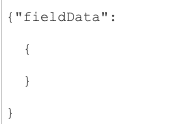
What is new with this call is the essential Body section, where you will store the data of the record you want to create. The Body is expecting data in JSON format containing field-and-value pairs that specify values for fields that are in the target layout. The JSON object must be named “fieldData”. To create an empty record, send in the following “empty” JSON object:
But for records where you know the data you would like to enter, compose key-value pairs based on the fields on your layout. I’ve included a very simple example JSON below, with the corresponding layout. I think it’s important to notice the use of commas instead of semicolons.

When you send the call with these correct headers, you will generate a “response” that includes the recordId of your newly created record. The response also includes a message, which will say “OK” if all goes well, and it will provide details of the error, if the record is not created.
In conclusion…
It is important to recognize that the examples in this blog just scratch the surface of the capabilities and uses of the FileMaker Data API. We did not even touch running scripts or creating or getting portal data. The purpose of this blog was to learn to prepare your databases for access through the Data API, as well as learn how the Postman app can help you save time, stay organized and understand the pieces of a call.